
by BR Tabatha
Sandal season is upon us! With the warmer weather due to tickle our tootsies, it's time to shed the socks and shoes and prep the netherest of regions with a little at-home pedicure action. How? Check out our super simple step-by-step guide!
Prep
Much like before applying makeup, or getting your self-tan on, a good pedicure needs a bit of prep. First of all, you need to set up your space. I prefer somewhere that's uncarpeted, so that it's easy to sweep up toenail clippings and deal to potential puddles. Next, I prepare my tools; laying a towel down on the floor and, next to it, a pumice and/or foot file, nail scissors, nail buffer/file, moisturiser, and perhaps a nail polish if I'm going to pretty up my toes. Lastly, I take a decent sized bucket and fill it with warm water - and, if I'm feeling extra, I'll pop some Epsom salts in there, too.
Pedi
Now for the pedicure itself. Where to start?
- Soak your feet. Give yourself ten to fifteen minutes to soften up your feet's skin and nails. Use the time waiting to relax in a way that brings you joy. I tend to watch beauty YouTube.
- Once your feet and nails are softened, take your nail clippers and trim your nails, remembering to cut across rather than in a curve in order to avoid ingrowns.
- Nails trimmed? Now's the time to use a nail file to smooth the edges.
- At this points, some might suggest pushing back your nail cuticles. I would suggest not. Nail cuticles can be sensitive wee things, and pushing them back or cutting them incorrectly can lead to infection. As far as I'm concerned, this is a job for a nail technician.
- Now that your nails are sorted, head to the entire foot area. Grab your pumice or foot file and give those dry and tough areas a good scrub. Once done, dunk your feet in the bucket to get rid of any lingering dead skin, then take them out and dry your feet off.
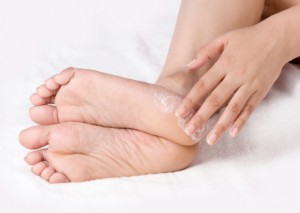
- If you're not planning to pop on nail polish, your last step is to simply take a thick moisturiser and work it into your feet.
- Polish a priority? Ensure your nails are dry, then apply a base coat to protect your nails, then pop on your polish (making sure to wait until your polish is dry before adding further coats), follow up with a top coat, and you're done!
Post
Want to get the most of your pedi? Post-pedi care will keep things looking great, while also helping to elongate time between your next at-home pedicure (because, let's be honest, as good as they are to do, doing them regularly is time consuming and, dare I say it, a touch boring). For me, that looks like moisturising and popping on a pair of socks before bedtime. Keeping on top of trimming my nails. Giving any rough spots a quick buff post-shower. And if I'm wearing nail polish, I'm not above touching up the colour at the base as my toes grow out.
While there's a bit of work involved, one thing's for sure, when the warmer weather hits, and you slip into your sandals or jandals for the first time, then look down at your tidied tootsies, you'll be sure to leave your home with a spring in your step. (I'll see myself out.)
So, do tell... Are you a fan of the at-home pedicure? How simple, or not so simple, is your routine? Is there anything you'd add to ours? Anything you'd skip? Let us know by chatting below!






Oh how i wish i could keep my nailed clean and tidy, and keeping those nails happy. Just after i spend my precious time on doing my nails.. after a big house clean up, those nails look so unhappy .. But after giving my nails a trim i like to brush it with some nail and cuticle oil and give a little massage.