Article by BR Natalie
Foundation. For many of us it's the most important step of our makeup routine - we want to create the perfect base, making our skin look radiant, healthy and flawless.
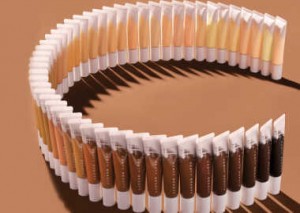
There really is a foundation for every one, but once you've narrowed down the shade and texture of your foundation, you're left with another choice. How to apply it.
Liquid/Cream Foundations.
However you choose to apply foundation - dot it around your face to ease blending. It's also easier to dab your foundation on the back of your hand and take the product from there using your tool of choice. Downward motions will smooth 'peach fuzz' and it's much easier to work in zones. Start on the nose, cheek one, cheek two, chin and lastly your forehead.
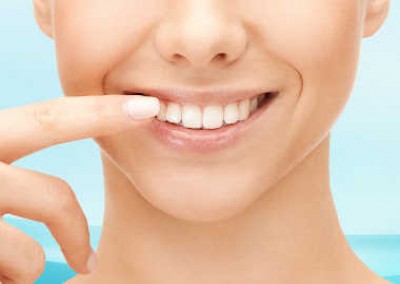
Fingers. There are two types of people in this world. ((How often do we use that one?!). Those that the mere thought of using their fingers to apply makeup brings them out in a nervous rash (with an accompanying 'ewww') and those of us that don't mind getting a little hands on.
The pros of using your fingers: They are free and always on hand. They allow for great control and don't absorb lots of product; in fact the warmth of your hands help 'melt' the product, so you'll probably end up using less. They're quick and other than washing your hands, there's no additional clean up required.
The cons of using your fingers: It can be difficult to achieve an even layer of foundation and it can also make it difficult to apply a thin layer. Oils from your hands can cause 2 problems - they can make oily skin worse and cause it to break out and they can actually change the colour of your foundation.
How to apply foundation using your fingers: Always wash your hands before and after. Take product from the back of your hands, don't repeatedly put your fingers in and out of the foundation bottle. Dot the foundation around your face in the areas that need it and blend using your finger tips. Don't do the 'face wash' and rub up and down vigourously!

Wedges. Makeup wedges are disposable, triangle sponges.
The pros of using a wedge: They're cheap and disposable, meaning you don't need to worry about cleaning them. They're great for applying a thin layer of foundation and work brilliantly with cream foundations because of this.
The cons of using a wedge: Being disposable they're not the most environmentally friendly option, and if you're throwing away after each use they might not be the most economical choice for you. Sponges absorb a lot of product meaning you'll end up wasting a lot of foundation over time. You might find getting into the nose crevices particularly difficult.
How to apply foundation using a wedge: Wet your sponge first and squeeze out the excess water. (This should help prevent the sponge from soaking up too much product.) Using the thin edge take product from the back of your hand and dot around your face. Blend the product using the sponge remembering to dab, not rub.

Blenders. Blending sponges are non disposable egg shaped sponges.
The pros of using a blending sponge: Most blenders are latex free, non allergenic and odour free. The elliptical shape allows you to get in to all the hard to blend areas and will easily provide a streak free finish.
The cons of using a blending sponge: Blending sponges absorb a lot of product. It's said that for daily full coverage foundation users, a blending sponge will absorb a bottle of foundation a year. As it's non-disposable you'll need to clean it, they harvest bacteria from the first use. There are specially formulated cleansers for blending sponges.
How to apply foundation using a blending sponge: Take product from the back of your hand. Bounce the sponge to blend makeup evenly (this is the same as stippling with a brush). Use the smaller, pointy end for around the eyes and nose and the fatter base for your cheeks and forehead. If you have depressions in your skin from scarring you can twist the sponge into the depressions and bounce out, to feather the makeup. You can use wet like a normal beauty sponge to limit absorption.

Brushes. There are several types of foundation brushes depending on what you're hoping to achieve. The most basic brush will be a flat top foundation brush. Once you've mastered that you can explore other options such as stippling brushes.
The pros of using a foundation brush: A good brush will last you for years and prove more economical than wedges. Brushes won't absorb the product and will allow you to achieve the thinnest layer of foundation. They're also great for blending in those tricky areas, like the hair line.
The cons of using a foundation brush: A reputable brush will set you back at least $30. You need to clean your brush often, preferably after every use. With time, any brush will lose bristles.
How to apply foundation using a foundation brush: Look for a flat top brush with pretty sturdy bristles. You'll also want to use a brush with synthetic bristles - animal hair isn't compatible with liquid makeup. Taking product from the back of your hand, dot the foundation and work on blending through the zones. Our top tip is to finish by using a powder foundation brush - it will be stiff enough to buff out any streaks and uneven areas but being shorter and broader it'll require less control. And it can eliminate the need for finishing powder.
Powder / Mineral Foundations.

When it comes to powder foundations your best bet is either a Large Powder Brush or a Kabuki brush. A shorter, more dense brush will give more coverage for less work.
How to apply:
1. Holding the brush horizontally, gently work the sides of the bristles into the powder with short, swift, back-and-forth strokes. (Like you're using an eraser!)
2. Gently push the bristles against the back of your hand to get the powder into the brush. Tap the side of the brush to remove any excess product.
3. Repeatedly press the powder brush onto your face with using circular motions to evenly deposit it onto your skin. This way the powder foundation builds to your desired level of coverage without it looking caked on and flaky.
4. If your neck and decolletage are going to be on show you might want to lightly work your way down to your chest.
Remember - whatever type of foundation you use and however you choose to apply it; only use foundation where and when you need it. If you've matched your shade correctly and chosen the right tool for the job, your foundation will blend into your skin, meaning you truly can adopt the mantra "less is more".


I've tried wedges but beauty blenders are far better.