When I first tried this I used it quite sparingly and found the application was easy. I think it would be better if the brush was a tad bit smaller and more defined. Because I used it quite sparingly I found that the result was good but not as dark as I expected it to be. I tried it again 2 days later and this time I was really generous with how much I used. I left it on for around 25mins. To remove the product i xoydlnt peel it off like the box showed. Instead I had to brush it off with an eyebrow brush. It was easy to remove and didn't pull any of my eyebrow hairs out. The result of my 2nd application was way better and I really liked it. I found it did last the 3 days and faded evenly so I was eased by that. Overall I will definitely reuse and repurchase. It's a great product for what it is and saves me time from filling in my brows in the morning. However if you were wanting a precise, perfect application you would need to still use a pencil or brow pomade.
Vault
Max value reached
Adding this item would put you over your total vault limit of $250. please review your cart to stay under the limit.
Maybelline Brow Tattoo Gel Tint Review
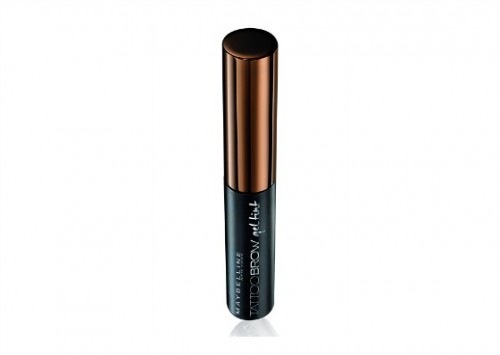
MAYBELLINE Tattoo Brow is a game-changing peel-off gel-tint that leaves brows perfectly defined and evenly filled for up to 3 days. Enriched with Royal Jelly & Aloe Vera, brows are left tinted and conditioned, gradually and evenly fading over time.
Website www.farmers.co.nz
Reviews
I get my eyebrows tinted. Something I'd rather not do but my brows are so thin and non-existent I have to! When I read about this product - it sounded like a replacement for my salon tint - and time saver and great for the budget
The gel comes in a tube similar to a mascara container, just smaller. Colour for me was Light brown. Reading the instructions, they've kept to 3 steps and simple. Brush it on, let it dry, and peel off after at least 20minutes.
The product goes on in a similar consistency to PVA glue. It goes on easily and smoothly. I painted the whole brow until hairs were well covered and sitting flat. The thinner outer edge of the brow was harder to paint to a thinner line, but I used a cotton bud to clean up the edges, plucked a couple of stray hairs around the edges once I liked the application, and the brows looked great! Waiting for it to dry I barely noticed the product on, and it didn't feel like it was tightening as it dried, which I liked. It dries to a touch quite quickly too.
I left the gel on for about 40 minutes. When it came to remove - it came off surprisingly easy, I picked up an edge of the gel with my fingernail and then pulled the gel off, which came off in mostly one long piece, to reveal a perfectly shaped and filled in brow. Very little product was left behind, and again a finger nail can remove any little strands left behind.
My brows looked really good. I was impressed. My eyebrows looked a little darker, the gaps filled with colour and they looked even! I don't have thick eyebrows, so you could definitely see the product between the brows - but no different than using another brow product to fill the gaps, or straight after a salon brow tint. The next morning - I checked the mirror and they were as I left them, perfectly formed and filled. They didn't appear to have really faded (I hadn't washed my face since application).
That morning after washing my face I did notice a little fade. I hadn't taken great care to avoid the brows with my face wash. Despite the fade they looked filled still. The more noticeable aspect of the fading was that with the light brown, it was fading off to a slight auburn/orange tint on me, which I toned down a little with my bb cream over my brows. The next day I took more care with washing my face, but again the fading was continuing, and I knew I'd be needing to do the tint again the next day. In my experience the product lasted 2 days well, and 3rd day I was wanting to re-do it. The fade shade I wasn't totally fond of, but I could fix that I imagine by choosing a different shade - maybe medium brown or grey.
The fading aside - I love the product, and it's probably enough to give up the salon tinting to do it at home instead. I get a nice tidy brow each day without fumbling with pencil and other products. I can do it at night and have lovely brows ready in the morning! I really like it and will continue use.
Tips: Leave it on a good 40 minutes or so for a good starting point with the tint as the fade happens quickly
Take care with cleansing and try and avoid brows so they don't fade too much - I imagine a gentler cleanser than what I use would help with slowing fade
I was so nervous to use this product actually because it says that it can stay on for days - so what if I mess it up and my face looks ridiculous for days right?? My fears were quickly eased when I just gave it a go. It’s very very easy to use. The applicator gives you a slightly runny paste texture and you just basically paint it along your natural brow line in the shape that you’d like. I didn’t do it in one swipe because I was being quite careful but once you’re used to it you could definitely do that.
You leave the product on for about 20 minutes while it dries. I think in future I will leave it on for longer because the product didn’t peel off as easily as I thought it would - it didn’t stick or pull which was great but it just came off in little bits.
The result was really great. I usually fill my brows in with a medium brown powder and the dark brown wasn’t too dark for me!
The results definitely fade after you wash your face and shower, which is expected, so for me it didn’t last the full 3 days with complete brows that I was expecting. However there was definitely colour in them for the whole time and I didn’t feel as though I needed to fill in my brows with brow powder during that time. For me, that’s the best thing. I usually fill in my brows everyday and if I can save myself one step in my mornings then that’s a definite win for me! I would recommend giving this a go if you like to fill in your brows daily as a replacement or if you’re in between brow appointments.
I have dark eyebrows so I choose the grey brown shade as the undertones matched my eyebrows nicely. I really only purchased this to try as it was new on the market.
The tint can last three days if you avoid washing the area excessively and not rubbing them but as I like to cleanse my whole face I found it didn't last more the a day or two.
I found the tint very easy to use. Brush on and leave for a minimum of twenty minutes. I would recommend applying thickly as the first time I used this I applied thinly and I struggled to peel the tint of in one clean piece. Occasionally I do see some eyebrow hairs on the gel but nothing to be alarmed at and I don't believe the tint damages my eyebrows.
Initally I thought it was a bit of a gimmick but overall I like this tattoo gel tint. It does a good job at concealing a small gap I have in one of my eyebrows and enhances the overall appearance of them while still looking natural.
Tips: People with light or thin eyebrow will benefit greatly from this product.
Thick but not too thick consistency. It lasts a few days which is good, especially if you're going on a trip and cannot be bothered doing your brows everyday! Doesn't dry too quick so you're able to wipe away any mistakes you make with a cotton bud, whilst perfecting the shape you like!
Tips: I found that using a different brush (i use an thin angled brush) to apply, rather than the one with the product. If you're wanting it to last longer, i recommend avoiding any rubbing of the brows when washing your face for a longer lasting tint.
I was excited to try this product, even though I already have microbladed eyebrows - which have faded to a reddish tone (they do need touched up). I got the Dark Brown Brow Tint. This applied really easily. I was concerned I might get wonky brows. And the colour was too dark. After 20 minutes I start peeling off, and was amazed with how fantastic my brows looked. I really wanted to test how long this would last without reapplying. By day 3 they had gone a reddish tone, and was quite noticeable, so I had to reapply. This however doesn’t put me off. I love that I don’t need to worry about my brows for a few days. And when it fades I can just reapply. This product will definitely be one of my Must haves (that is until I get my brows microbladed again). Most definitely love this product and the ease of use! And at its rrp I totally will buy it in future!
Tips: When doing the tail of your brow, start from the thickest part and do one fluid movement with the brush. Repeat till evenly covered. Wipe away any tint that gets in an area it’s not wanted, straight away. I just use my finger nail to scrape away. A wipe will work too.
My brows and I have always had a love hate relationship... they unfortunately have a sparse shape that cannot be influenced by me, so most of the time I resort to filling them in with a crayon like pencil. That was until this bad boy product came into my life!
This product definitely surprised me, I had never used something so seemingly permanent (I know 3 days isn't too permanent but it was still scary). It was easy enough to use. However I wish the brush was a bit finer, I found it hard to get good defined lines, which resulted in a little bit too much in the brow department size wise. It applied like a tar and made me look like a cartoon character which I found amusing.
I wanted to really test it out so I left my medium brown colour on for an hour... it was perfect. Any longer and it probably would have been too dark. It was so satisfying peeling it off. Underneath my brows were defined, bold and how I would do them with pencil every morning. The mornings are so much less stressful because my brows are all ready to rock and roll.
This product lasted approximately 3 days before it had faded completely, although in the last day it seemed to have an orange like tone to it.
Regardless of this I will definitely continue to use this fine product!
When I first heard about this product as someone who has only recently started including eyebrows into my daily routine I thought tattoo brow sounded scary. But I bit the bullet and bought it.
The steps are super simple 3 easy to follow steps. The gel is quite thick and I found the applicator abit thick. I opted to use an angled brush on the tail of my brows to get a more precise application.
You can definitely notice a difference once removed after 20 minutes but I do on occasions still feel the need to fill them in. I use the shade medium brown and its a pretty good match
This is the most simple way of touching up your eyebrows! Makes the brows stand out, And it goes on smoothy and not blotchy which is a huge plus


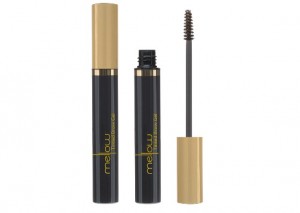
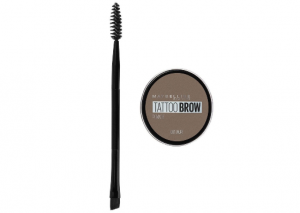





MAYBELLINE BROW TATTOO GEL TINT
1. PACKAGING: The product comes in a small box, on the box you can find the listed ingredients, a list of "caution" notes, the shade name, the claims of the product, and an easy to follow step by step with photo's as well . . . all of this on such a small box, I am impressed!! Inside the box you will find a tube that holds the magical product. It has a shiny bronze colour screw cap and a matte black base that is clearly labelled with the product name. When you screw off the cap it has a small brush coated in product.
2. THE PRODUCT: The product is a thick consistency and as described is very gel like.
3. HOW TO USE IT: I have followed the box instructions by applying the product to clean brow, sweeping the product along the natural brow hairs, then letting the product dry for at least 20 mintues, the peeling the product off. But I tried a different method the 2nd time I tested it as the first time seemed to be abit messy and one brow looked way more thicker than the other. So I then decided to start off by making sure my brow area was clean and ready to go, I used a makeup brow spoolie to comb through my brow hairs. I then used a eyeliner kohl pencil to mark out my brows (I also used an Anastasia Beverly Hills Brow Stencil as a guide), once I was happy with the brow shape, I used a cotton bud/ Q-tip to apply a thin layer of a balm around the outline of the brow marking that I made with the eye pencil (this acts as a barrier so the tint doesn't stain outside the line), I then apply then gel tint starting 1/3 in from my nose, I apply the product heavy to the tail part of my brow, once there is less product on the brush I go back and lightly apply product to the inner part of my brow as I prefer the gradient brow look. I set my phone's timer for 20 minutes, once the time is up I check to see if the product has tried down before peeling it off starting to peel from the tail of my brow inwards. I then use a spoolie to sweep through the brows to make sure the product has been removed. I then used a cotton pad and a small drop of makeup remover to clean up around the brows where the brow stencil markings were placed. I found this method worked great for me.
4. MY FINAL THOUGHTS: I was so excited to receive this product to test out. So I had great expectations of this product. I received the shade GREY BROWN which was an excellent colour match. After finding a different method that suited me I really like this product. There is only a couple of things I didn't like and that was the brush . . . I wish the brush was more of a brow brush than a nail polish type of brush also if the brush was a little more denser. The other thing is that I wish it lasted longer . . . I find that if I wear makeup and then wash my makeup off at the end of the day the brow tint also gets taken off.
OVERALL RATING: 8.5/10
Tips: Apply the product thick in the places that you prefer more tint and lighter hand in the places you prefer less tinting.